Wednesday, May 31, 2017

June Kit Instructions

The NEW June Kit-of-the-Month is out and I must admit, it's my favorite so far! 

It's BACK-TO-BASICS this month featuring some of our most popular classic pieces. We've combined these elegant trays with a few of our newest and most interesting findings to create FIVE gorgeous projects that are certain to dazzle you or anyone you decide to share them with! We've also included our Woodblock Butterflies and Collage Words Art Image Sheets! Words and short phrases can add so much meaning to a piece allowing it to be completely customized for the recipient.  

Let's put these gorgeous pieces together...

Assembly Instructions

Thanks for ordering the Craft Fantastic JUNE KIT! This kit is available for a limited time. 
Click HERE to order yours today!  

Here's a few links to help you complete the projects followed by a few 
assembly instructions for each piece:


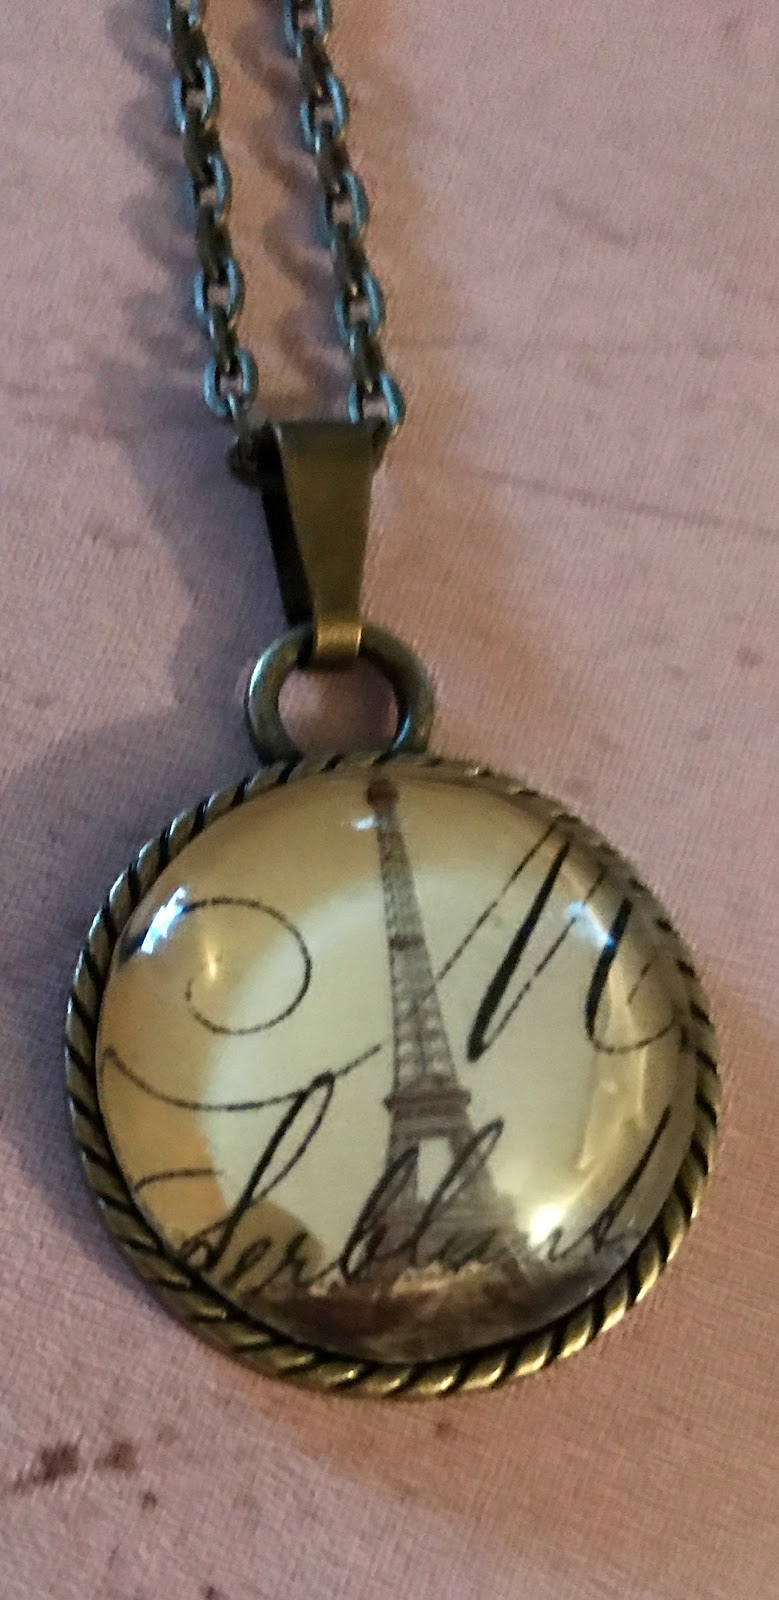
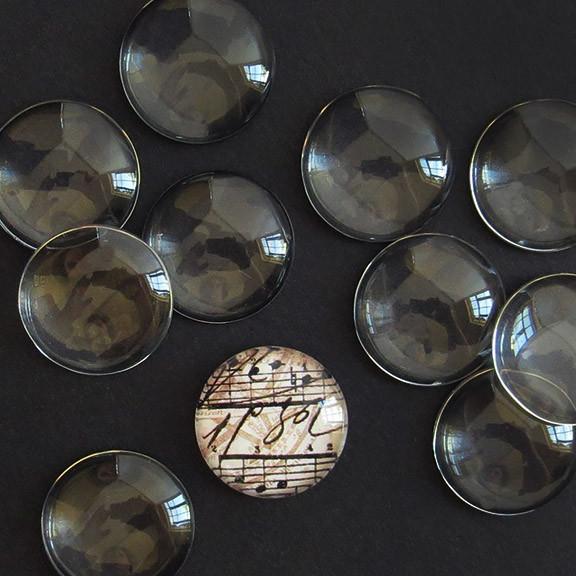
  1. Select images and add them to the glass cabochons using Fantastic Glaze & Glue. This piece contains a Duo-Side Tray so there will be two medium round pieces of glass for this tray. 
  2. Thread the key ring onto the key clip.
  3. Thread the bail of the Large Square Pendant Tray onto the key ring.
  4. Attach the Medium Round Duo-Side Charm Tray to the ring using a small jump ring.
  5. Attach the Dragonfly Disc Charm to the ring using a small jump ring.
  6. Add a Fantastic Sticky Dot to each tray. Remove the red backing to expose the adhesive. 
  7. Firmly press the appropriate cabochon into each tray. 


  1. Select an image and add it to the glass cabochon using Fantastic Glaze & Glue.   
  2. Remove the clasp and small jump ring from the 24" Rolo Chain.
  3. Attach the flower piece of the toggle to one end of the chain using a small jump ring. Attach the bar piece of the toggle to the other end of the chain also using a small jump ring.
  4. Attach a large jump ring to the bail of the Long Rectangle Tray.
  5. Connect the large jump ring on the tray to the flower piece of the toggle using a pinch bail.
  6. Add two Fantastic Sticky Dots to the Long Rectangle Tray. Remove the red backing to expose the adhesive. 
  7. Firmly press the appropriate cabochon into the tray. 


  1. Select images and add them to the glass cabochons using Fantastic Glaze & Glue.  
  2. Using scissors, cut the center of the 24" Rolo chain.
  3. Attach a small jump ring to each end of the Rolo chain.
  4. Attach the Medium Round Pendant Tray to the Rolo Chain using a large jump ring. 
  5. Attach the Small Square Pendant Tray to the bail of the Medium Round Pendant Tray using two large jump rings and one small jump ring. (refer to photo)
  6. Attach the Mini Square Pendant Tray to the bail of the Small Square Pendant Tray using two large jump rings and one small jump ring. (refer to photo)
  7. Add a Fantastic Sticky Dot to each tray. Remove the red backing to expose the adhesive. 
  8. Firmly press the appropriate cabochon into each tray. 

  1. Select images and add them to the glass cabochons using Fantastic Glaze & Glue. 
  2. Add a Fantastic Sticky Dot to each tray. Remove the red backing to expose the adhesive. 
  3. Firmly press the appropriate cabochon into each tray. 

  1. String Dragonfly Charm onto each Long Earwire.
  2. Wear and enjoy all the compliments!
We hope you have fun putting together the JUNE Kit-of-the-Month! Be sure to follow Craft Fantasic on FACEBOOK and INSTAGRAM! Also, sign up for the CRAFT FANTASTIC NEWSLETTER for the latest and greatest sales, giveaways and product peeks! 

See you soon with more crafty stuff!

Tuesday, May 30, 2017

Relax With Craft Fantastic

Hi All! Today on the Craft Fantastic Blog I am sharing a card with you using the Open Daisy Kit, Alphabet #1, Fantastic Glaze & Glue, and Fantastic Super Sticky Dots.

I am using a pink card base with a piece of pattern paper. Next I stamped the girl on watercolor paper and colored using Zig watercolor markers. Next I cut out the stamped image.

I then did remove the extra piece on the open daisy pieces that you would use to add on a jump ring. Next I added the open daisy charms, jewelers glass and letters from Alphabet #1, glaze and glue and fantastic super sticky dots to create the sentiment for the card. 

For the last step, attach the pieces to the card and there you have an adorable summer card, RELAX!

 
So, what do you think? Please leave me a comment and let me know how you like this project!
 
Hugs,
 
Judy

Saturday, May 27, 2017

Graduation Gift Card Holders + Craft Fantastic

Hi everybody! Kim here from My Kraft Kloset sharing a super easy gift card holder with personalized embellishments from Craft Fantastic number image sheets. Perfect for those upcoming Graduations.


Lets get started:


1. Gather up your supplies. Believe it or not, you will need an empty toilet roll holder to recycle for this project. Paper towel holders would work too, just cut in half. Or you can purchase new ones online. Really! lol. Press holder down to flatten, crease the sides with your hands or a bone folder.


2. Choose a patterned paper and cut a 4x6" strip.  Spread Craft Fantastic Glaze & Glue all over the holder, one side at a time, and wrap paper around holder. Repeat on other side. 
Trim any excess paper.


3. Add a brad or an eyelet to one end of the holder so the gift card doesn't fall through the bottom. You can also place a dollar bill or check, a tag, or even a message inside too!

4. Punch or cut out the numbers from the image sheet. Add a jewelers dot to the backs, peel off the red backing, and adhere to the holder.


And Viola! A fantastic gift card holder for all your special occasions, any time of the year, just change the patterned paper, and personalize the sentiment with Craft Fantastic letter and number image sheets. The possibilities are endless! 

Please leave us a comment and let us know what you think, we’d love to hear from you. Congratulations Graduates! Thanks for stopping by!

~Kim Klinkovsky @mykraftkloset

Craft Fantastic Supplies:
Other supplies: Reminiscence graduation paper; 1" square punch; toilet rolls

Tuesday, May 23, 2017

"Paris is always a good idea" Audrey Hepburn

Hi it's Liz from Junque Drawer Designs and today I celebrate the city of love, Paris!  The Paris Image Sheet is one of my all time favorites from Craft Fantastic, and Paris is one of the most popular pendant design I sell at craft shows, especially for teacher gifts. 


I first chose my designs and adhered the jewelers glass with the craft fantastic glaze and glue.  Once dry I then placed them into the trays I had chosen for the specific images.


I decided on using the Antique Brass and the Silver trays along with a key ring and an Oval Rope Ring tray. There are so many possibilities with this image sheet, using entire image or just part of an image as I did with the smaller key ring tray.


Craft Fantastic products used in this project include:

Paris Image Sheet
Small Oval Rope Ring Antique Brass
Key Ring with clip Antique Brass
Medium Square Pendant Tray Silver
Small Square Pendant Tray Brass
Medium Glass Round
Fantastic Super Sticky Dots
Fantastic Glaze and Glue
30" rolo chain silver and antique brass
Medium Glass Squares
Small Glass Square
Small Glass Oval
Swirl Tray Antique Brass
Antique Brass Pinch Bail

Oui, oui, Paris!


Saturday, May 20, 2017

Watercolor Charms

Hello everyone!!  Kymona here from Kreative Kymona to share a couple of watercolor charms that are perfect for my new traveler's notebooks.

I used the images from May's Watercolor Kit to create my charms.  I totally love the watercolor images. They are so pretty and perfect for me since watercolor is my favorite medium. 

Take a look at what I create:


Aren't those charms just the cutest!! I love how it adds details to my travelers notebooks.

Here's the close up:


Creating these charms are easy to do. It's a matter of picking out the charm, the image and waiting for the glue to dry. 


For the Create charm, I used Twist Link Tray, Small Glass Rounds, Small Jump Rings, Butterfly Connector, Keyrings with Clips and my own K charm from an old book that I had for years. 


You can always add more elements and/or change out elements based on the season.  Totally versatile.  I can't wait to more of theses as my traveler's notebook collection increases. 

Before I go, I wanted to talk to you about the May 2017 Kit that is currently in the shop!!

I used my kit to make some necklaces for my coworkers family members.  She loved them. 

Take a look:


So what do you think?  Aren't these watercolor pieces beautiful? Please let me know below.  I would love to hear from you!!

Just in case you didn't know you can find Craft Fantastic on all of the social media platforms:

Facebook  ~  Instagram  ~  Pinterest  ~  Twitter  ~  Blog


Follow so that you don't miss out on any of the creative ideas, deals and new goodies that appear in the store.

Thank you so much for stopping by!!

Tuesday, May 16, 2017

Craft Fantastic Time For Some Cardmaking!

Hi All!  I love using my Craft Fantastic supplies for different types of projects, so today we will look at some cards featuring Craft Fantastic's amazing new image sheets: Tea Time and Watercolor Inspiration!

First up this card features images from the Watercolor Inspirations image sheet, Fantastic Glaze & Glue and our Long Glass Rectangles. While this is a really simple card it is really elegant, fun and on trend.
 This next card is again simple although it may not look it! This card is simply a 5x7 decorated card base, a black fancy die cut, our Southwest Tray with a  Large Glass Round, an image from our Tea Time Image Sheet, Fantastic Glaze & Glue and a cute little ribbon bow to finish off this card.
Finally this third card, while also a pretty basic design, also features images from the Tea Time Image Sheet. The look and feel of this card is much different from the one above. This one is more casual, and uses both the Mini Glass Squares, the Xtra Large Glass Squares, and  Fantastic Glaze & Glue.
So what do you think? Leave a comment below and let me know how you like these!
 
Hugs,
 
Judy

Saturday, May 13, 2017

Celebrate Mom with Craft Fantastic


Hi everybody! Kim here from My Kraft Kloset sharing a very special jewelry set I made for my Mom using all Craft Fantastic products.  And as Mother’s Day is tomorrow Sunday, May 14th you do still have time to make a set for all the special ladies in your life too. Because it truly is fast, simple, inexpensive, and turns out...oh so...beautifully.


Let’s get started: Gather up all your supplies and choose your images.

1. I chose a large daisy image for the pendant and two smaller daisy images for the earrings, because they are my Moms favorite flower, but I love them too. As shown in the picture above the new glass bling will also fit in these stunning earring trays too.

 
2. Add a few Craft Fantastic Glaze & Glue droplets onto the back of the glass circles and place onto the daisy images. Move your glass around to position your images, add a little pressure to get any bubbles out, and make sure the surface is completely covered. Hold in place for a couple minutes to set in place. Let dry for a few minutes.

3.  Once dry, use a Q-tip to remove any excess glue around the edges of the glass. Cut around the edges of the glass and cut out the images. 

4.  The earrings:  I chose these *NEW* silver earring trays for my daisy images to sit in. Cut one Fantastic Jewelers Dot in half, because the tray is very small, and place inside each tray. Peel off the red backing, place the glass into the trays, and press down to secure in place. 

 5. With pliers open a small jump ring, place through the bottom loop of the tray, add heart charms to each earring, and close with pliers. Add finished trays to the long earwires to complete a pair of earrings.


 6.  The pendant: Repeat Steps 2-3 as shown above.  


7.  Next I chose this stunning *NEW* antique silver rosette tray pendant for my image to sit in. To me, it looks like open hearts on each petal. Added 2-3 Fantastic Jewelers Dots to hold the glass in place, peel off red backing, place the glass into the tray, and press down all over to secure in place.

8. With pliers open a large jump ring, place through the pendant and add the heart charm, and close with pliers. Add a long draping neck chain to complete your gift. Voila! 
Another stunning handmade jewelry set that is super special for Mom or any special lady!

I hope I’ve inspired you to try these wonderful Craft Fantastic products, because the possibilities are truly endless!  So think about giving this hobby a try and make a gift that is uniquely handmade for any occasion. Please leave us a comment and let us know what you think, we’d love to hear from you. Thanks for stopping by! Happy Mother's Day!
 
 ~Kim Klinkovsky @mykraftkloset

Craft Fantastic Supplies:
FANTASTIC SUPER STICKY JEWELERS DOTS 
MULTI PURPOSE JEWELRY PLIERS
VINTAGE BIRDS mini & small glass sizes (earring daisy images) 
30" ROLO CHAIN silver (nice "drapy" quality)
LONG EARWIRES silver
Q-tips

Tuesday, May 9, 2017

Time for Tea

Hi it's Liz from Junque Drawer Designs and I am loving the new image sheet "Tea Time".  With Mother's Day approaching soon these are some fantastic gift ideas for  Mom, Grandma, or just for anyone special in your life. 


I went with more of a monochromatic color scheme for these pieces.  The image sheet has several other images with many colors:


I decided to use the Long Rectangle Pendant trays along with the Long Glass Rectangles, the Tiny Round Glass Bling for the Mini Round Duo-Side trays, Long Antique Brass Earwires, small and large antique brass jump rings, Antique Brass Butterfly connectors, small glass square with small square charm tray, Small Glass Square with Small Round Charm Tray all in Antique Brass, 30" Rolo Chain for all the projects.


After I applied the Image to the Glass Cabochon with the Fantastic Glaze and Glue I trim away all the excess paper from the glass/image and then I placed the Sticky Dots into the trays to create a strong bond between the tray and glass. 


I especially like the Mini Round Glass Bling which is on both sides of the duo-sided mini round trays, (the earrings).  Check out all these supplies and more on the Craft Fantastic website.
https://www.craftfantastic.com/

Saturday, May 6, 2017

Antique Necklaces

Hello everyone!!  Kymona here from Kreative Kymona to share a couple of Antique Necklaces I created for a couple of my writing friends.

For the month of April I participated in a 30 day writing challenge, where I wrote one letter a day to random people.  In each letter, I included a gift that I created.  I have to say that I didn't finish the challenge but I will continue it for the month of May.

So the people that receive a letter from me this month will get a pretty Antique Necklace!!

Lets take a look at the first three:


I have to say I wasn't a fan of the antique jewelry at first but the more I play and create with them, the more they are becoming my favorite.  

They looks so pretty with vintage images.  

I created these necklaces the same way I created this necklace.  You can see the full tutorial there. 

I have a couple more necklaces to create for a couple more letter recipients.  I hope they like them.


So what do you think?  Would you create using the antique necklaces? Please let me know below.  I would love to hear from you!!

Just in case you didn't know you can find Craft Fantastic on all of the social media platforms:

Facebook  ~  Instagram  ~  Pinterest  ~  Twitter  ~  Blog


Follow so that you don't miss out on any of the creative ideas, deals and new goodies that appear in the store.

Supplies used:


24" Classic Chain Antique Brass


Thanks for stopping by!!